
WeMos D1 mini (esp8266), debug on secondary UART – Part 3
As you can see in the pinout diagram WeMos D1 mini have 2 UART, one on dedicated pins and a transmit-only UART that can be enabled on GPIO2 (D4).
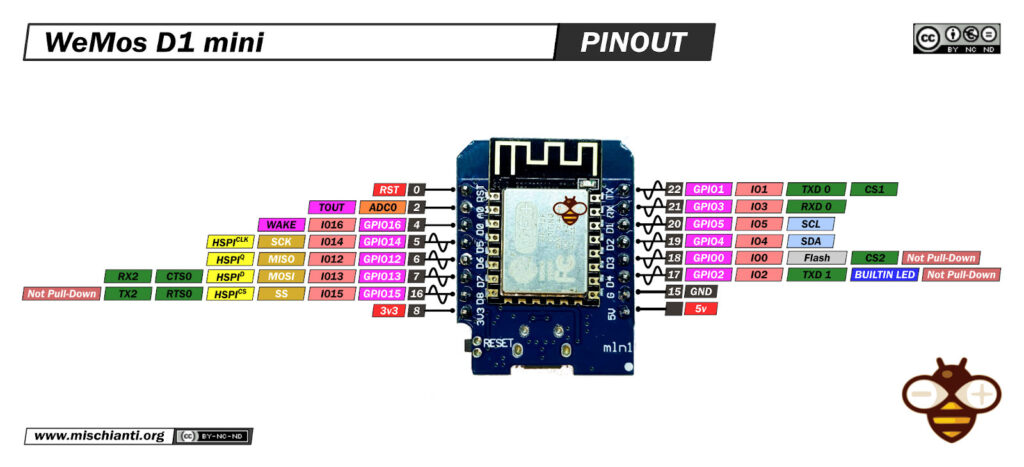
This single pin can be used at configuration time to transmit core debug information or custom Serial1 print.
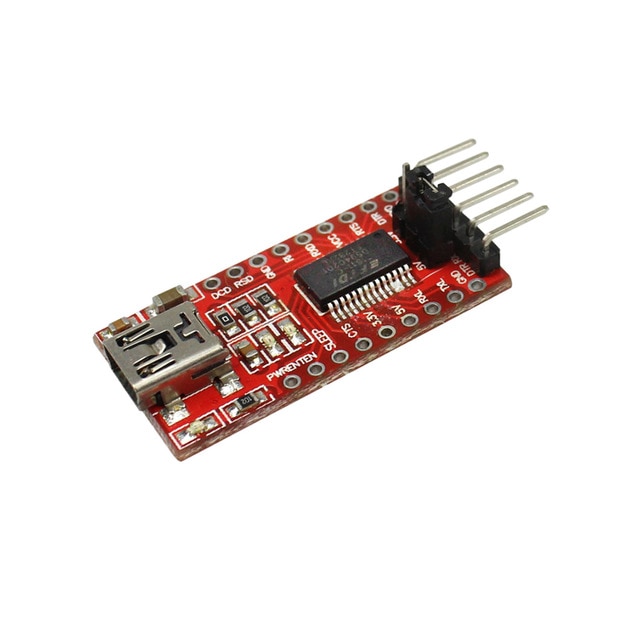
To connect, naturally, you must use a USB to TTL converter, you can find it at 1$.
Exists more expensive FT232RL or FT232 module, but a CH340G or CH340 working very good.
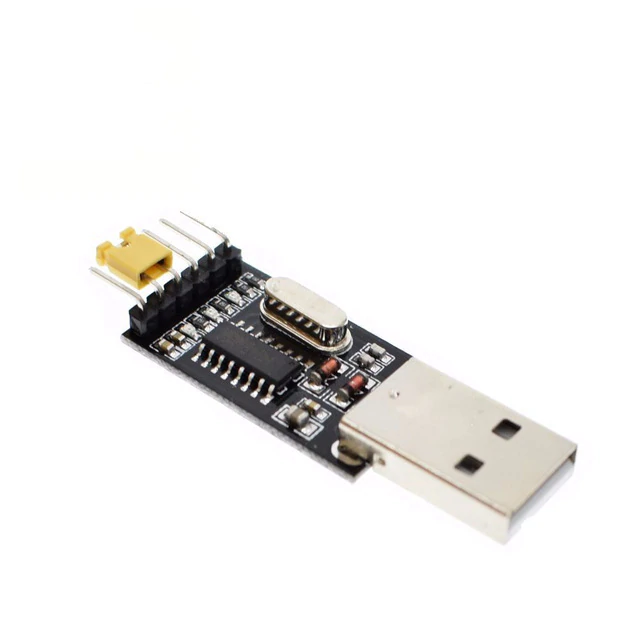
You can find here USB to TTL CH340G - USB to TTL FT232RL
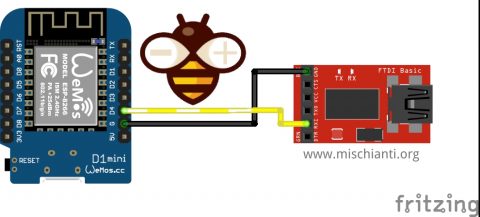
Connection schema is very simple.
Example
/*
 *  WeMos D1 mini (esp8266)
 *  Debug on standard Serial and Serial1 on GPIO2 (D4) pin
 *  by Mischianti Renzo <https://mischianti.org>
 *
 *  https://mischianti.org/wemos-d1-mini-esp8266-debug-on-secondary-uart-part-3/
 *
 */
#include "Arduino.h"

void setup()
{
	Serial.begin(9600);
	Serial1.begin(9600);
}

int i = 0;
void loop()
{
	i++;
	Serial.print("Hi, I'm Serial on standard TX RX pin! --> ");
	Serial.println(i);
	Serial1.print("Hi, I'm Serial1 on D4 pin (GPIO2)! --> ");
	Serial1.println(i);
	delay(1000);
}
Here the serial monitor on standard UART (USB connection).
Hi, I'm Serial on standard TX RX pin! --> 1
Hi, I'm Serial on standard TX RX pin! --> 2
Hi, I'm Serial on standard TX RX pin! --> 3
Hi, I'm Serial on standard TX RX pin! --> 4
Here the serial monitor on D4 pin (USB to TTL converter).
Hi, I'm Serial1 on D4 pin (GPIO2)! --> 1
Hi, I'm Serial1 on D4 pin (GPIO2)! --> 2
Hi, I'm Serial1 on D4 pin (GPIO2)! --> 3
Hi, I'm Serial1 on D4 pin (GPIO2)! --> 4
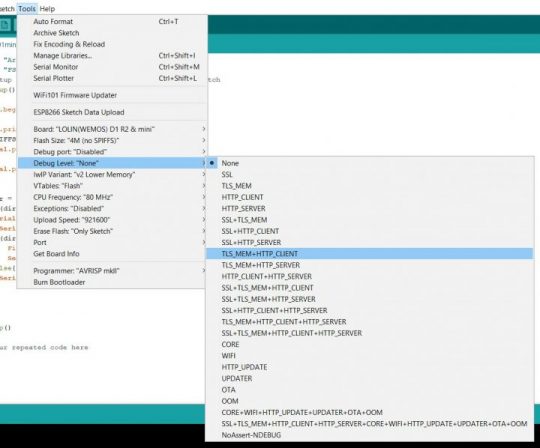
Core debug
You can activate in Tools --> Debug level core debug that are setted at build time. This flag help to debug core function as WIFI or SSL and so on.
Thanks
- WeMos D1 mini (esp8266), specs and IDE configuration
- WeMos D1 mini (esp8266), integrated SPIFFS Filesystem
- WeMos D1 mini (esp8266), debug on secondary UART
- WeMos D1 mini (esp8266), the three type of sleep mode to manage energy savings
- WeMos D1 mini (esp8266), integrated LittleFS Filesystem
- esp12 esp07 (esp8266): flash, pinout, specs and IDE configuration
- Firmware and OTA update management
- Firmware management
- OTA update with Arduino IDE
- OTA update with Web Browser
- Self OTA uptate from HTTP server
- Non standard Firmware update
- esp32 and esp8266: FAT filesystem on external SPI flash memory
- i2c esp8266: how to, network 5v, 3.3v, speed, and custom pins
- […]


Mi piace, è conciso: problema e soluzione. Un appunto: non si vede l’alimentazione del convertitore USB-Seriale, faresti meglio a precisare che arriva dall’USB collegata ad un utilizzatore che fornisce tensione.
Grazie Augusto,
è che in teoria l’alimentazione può essere fornita dal pin o dall’usb, comunque si è meglio specificare.
Ciao RM